Hi all,well its freezing here as usual and just taken me 10mins to defrost the car.....its too early to be up to be honest but i am off to the Bristol monthly craft meet. Thought i would take them all a little handmade pressie and made these quick love bug jars
Quick and easy valentine gifts,just needed to print off onto card,coloured in with promarkers and added my signature and a yummy chocolate bug which you can get from tescos.
If you fancy making them you can download the template here Also made these felt love hearts for some special ladies i call the car gang and have filled them with love hearts,bugs and heart rocks.
Used my new heart nesties,ribbon and glue gun,still not good though at avoiding gluing my fingers.....lol
And to treat myself this week as some gloves i ordered for my hands (to help with arthritis) havent turned up yet, managed to nab a set of the new promarker limited edition spring colour pens so cant wait to play.
Off to make a Valentines card and heart box for my beloved hubby (its our wedding anniversary on tuesday) and catch up with all the ladies who meet at Bristol,have a good day all.
Sunday, 12 February 2012
Sunday, 5 February 2012
Labour of love
First off all a warning as there are lots of photos.........lol you have been warned :)
Wanted to make something for my mum who will be 60 at the end of the month for her to keep but didnt take up to much space and also had a purpose so on one of my many trips to the local charity shops found this box complete with eye shadows which i binned.
Wasn't sure where to start but dug out the acrylic paint and gave the drawer and box several coats first over a few days only for disaster to strike and the whole lot to fall off in one piece from the drawer section as i hadnt keyed the surface.........lol
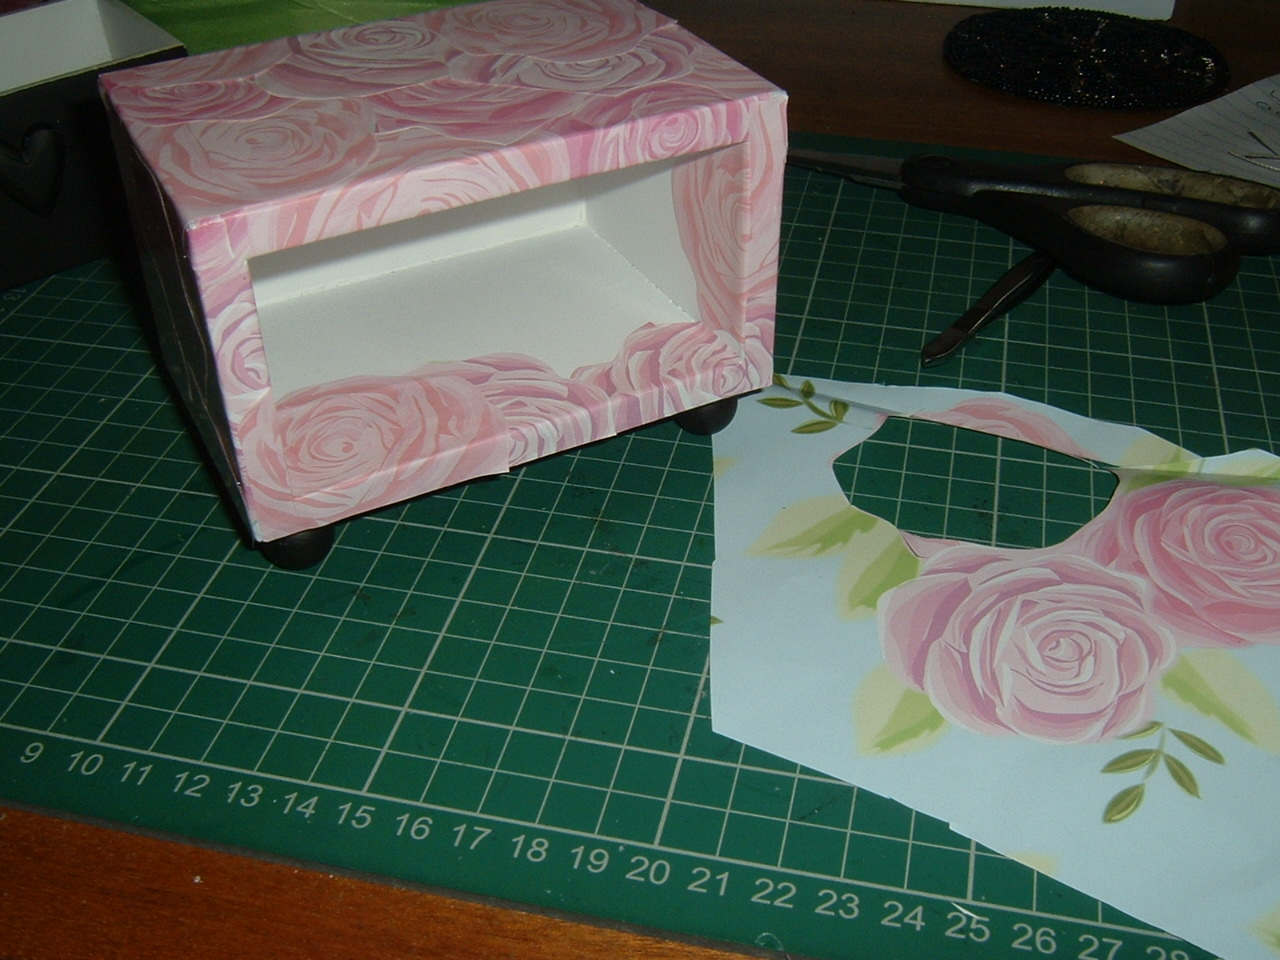
So sanded down drawer front and started again with the acrylic paint,box was covering fine and then on to cutting up some wrapping paper,my mum loves roses and i decopatched them all over the box
but decided i didnt like that effect so next came the varnish which i coated all over,making rather a mess!
Loved the bumpy texture it gave to the paper where it had not dried smooth which gave me my next idea which was to cover it in black acrylic paint!! i know what was i thinking.....lol
Anyway once dried raided the tool cupboard for some sandpaper and had fun attacking and sanding down and getting a very distressed look and covering me in dust :)
Well after that came the nice bit of adding some decoration to the box to complete it,so there we are one finished box.
Just hope she likes it after all that,now need to find something to go in the box.
Thanks for hanging onto to the end,this has taken me two weeks on and off so must be a record for one of my longest projects.
Can i just say how much i appreciate all your lovely comments on my blog and i do try to repay the favour and hello to my new followers,x

Wanted to make something for my mum who will be 60 at the end of the month for her to keep but didnt take up to much space and also had a purpose so on one of my many trips to the local charity shops found this box complete with eye shadows which i binned.
Wasn't sure where to start but dug out the acrylic paint and gave the drawer and box several coats first over a few days only for disaster to strike and the whole lot to fall off in one piece from the drawer section as i hadnt keyed the surface.........lol
So sanded down drawer front and started again with the acrylic paint,box was covering fine and then on to cutting up some wrapping paper,my mum loves roses and i decopatched them all over the box
but decided i didnt like that effect so next came the varnish which i coated all over,making rather a mess!
Loved the bumpy texture it gave to the paper where it had not dried smooth which gave me my next idea which was to cover it in black acrylic paint!! i know what was i thinking.....lol
Anyway once dried raided the tool cupboard for some sandpaper and had fun attacking and sanding down and getting a very distressed look and covering me in dust :)
Well after that came the nice bit of adding some decoration to the box to complete it,so there we are one finished box.
Just hope she likes it after all that,now need to find something to go in the box.
Thanks for hanging onto to the end,this has taken me two weeks on and off so must be a record for one of my longest projects.
Can i just say how much i appreciate all your lovely comments on my blog and i do try to repay the favour and hello to my new followers,x

Monday, 30 January 2012
Rolled flowers and card
Hi all,well needed to make a birthday card and decided to combine it with a challenge over on Docrafts and one of the requirements was to include a handmade flower.Making flowers is a weakness of mine though so my trusty cricut came to my rescue and and svg files from this amazing blog.Had a play and made these three
and i used the kraft card flower on the card below.
Used basic grey 'green at heart' papers,kraft and core card,scallop circle nesties,basic grey flower stamp and distress ink 'seedless preserves',added some pearls from stash onto flourishes cut from a marianne die.
Off to add this to the challenge,have a good day,x
and i used the kraft card flower on the card below.
Used basic grey 'green at heart' papers,kraft and core card,scallop circle nesties,basic grey flower stamp and distress ink 'seedless preserves',added some pearls from stash onto flourishes cut from a marianne die.
Off to add this to the challenge,have a good day,x
Thursday, 26 January 2012
70th Birthday Pressies
Hello,expect you are all amazed at two posts in a short space of time.....lol.Dont know how you all manage to blog daily and craft,time seems to be very elusive in this house! Well had a mad panic last night as realised i hadnt made the presents for a friend who was turning 70 today, so had a craft session last night when i would rather have been snoozing.......lol
I decorated a bag which i had recieved in a swop from Teresa to match the bird house which i adapted from a tutorial which i will try and link later.Inside the bird house is two mini jars of her fave marmalade.
Made a matching card using a Hero Arts stamp,ribbon,and pearls from stash,actually like the card too!
and i am pleased to say that she loved them which is always a relief. Right off to get my pjs on and do a bit of blog hopping as my cold appears to be staying with me this week,will be glad when it goes.
Happy crafting all,x
Monday, 23 January 2012
Felt day projects
Hello everyone, well i had a lovely day meeting up with some docrafters and having a felt day. We had fun making little feltie characters and playing with the felt though i ended up being attacked by the glue gun several times....lol
Anyway this is my fave thing i made yesterday and its going to a good friend at work for her birthday
| robin keyring |
| Hoodie wolf Heart hanging Felt brooch Well seem to have got a bit blurry on the last two pics........oops..............lol Had great fun anyway making these and looking forward to making some more. Off to get some more tissue as full of cold so dont get too close,x |
Saturday, 7 January 2012
Mini album finally finished :)
Hi all,well this is a project i started at the last Bristol craft meet and was awaiting some finishing touches.Have decided to use it as a photo album of this year and aim to use my camera more and not just for taking pictures for here or my docrafts gallery.
The butterflies are from my favourite punch (EK success butterfly layering punch) and you have the option of cutting out 3 butterflies which you can use on your own or layer up.
Off to catch up on your blogs and thanks for taking the time to visit me,x
| front cover |
The album is double sided and has pockets for tags and loads of mat for photos so i have no excuse not to use it.
I used First Edition Isabelle paperpack for all the mats,tabs and even on the butterflies.The butterflies are from my favourite punch (EK success butterfly layering punch) and you have the option of cutting out 3 butterflies which you can use on your own or layer up.
Tags for inside were cut out on my cricut and i then added tabs which were made with the stampin up tag punch which i nabbed off sue......lol. Its on the top of my wish list at the moment along with a hundred other items i would love!
Well i have finished it just in time as tomorrow i am off to this months meet......lolOff to catch up on your blogs and thanks for taking the time to visit me,x
Sunday, 1 January 2012
Happy New Year everyone
Would like to wish all my followers a wonderful New Year and hope it brings you health,happiness and especially the wealth for all your crafting goodies!
Subscribe to:
Posts (Atom)